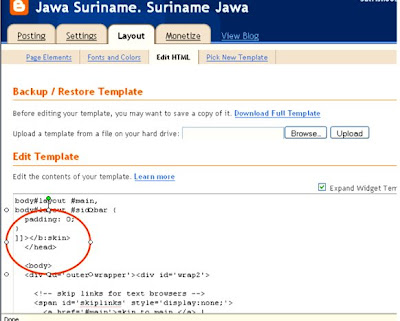
After you sign-in, click "Layout", click "Edit HTML", then click "Expand Widget Templates" box. In its HTML Box, find HTML code below :
 Take a look at image shown below:
Under HTML code below:
 type or insert HTML code below:
 And, this is the result:
 Then, find out HTML below:
 Under that HTML code, type HTML code below:
 And this is the result:
 Then, SAVE TEMPLATE.
The next step is placing the "READ MORE..." in each of your article or Blog post. Here is the steps you must follow.
Get in "Edit Html" mode of your Blog Post or Edit Post (do not get in "Compose" mode) .
Type HTML code below, where you want the "READ MORE..." to be placed in your article or Blog post:
 Take a look at my example below, where I place the "READ MORE" at this Blog post:
 At the end of your article or Blog post type HTML code below:
 If you did these steps correctly, your article or Blog post will be cut by "READ MORE..." and the complete article or Blog post will be seen after the "READ MORE..." to be clicked. Since I did these steps in this Blog post correctly, then the result is like this:
 Well. Feel free to try..!!


2 comments:
Thanks for visiting my blog.
This is a quite useful information. Thanks for sharing it! Wish you a nice sunday!
boleh nih. ntar bisa saya pake di blogspot sya...
salam kenal
Post a Comment